How to use Gmail to receive and send email from your domain.
Why you may want to do this:
- Your email storage is very high and you wish to use Gmail's free 25gb of email storage
- You prefer the Gmail interface over the standard hosting webmail interface
- You use Gmail often and don't want to check email in different places
What this setup will do:
- Following this setup will cause Gmail to check email from our server, download the email, and store it in your Gmail account.
- The mail will no longer be stored on our system.
- You will be able to send email from Gmail that appears to come from your domain. (example, test@name-serve.net)
Alternatives to using Gmail
- If your email storage is high, you are likely using either webmail only to check email, or your email program is setup to check mail as an 'IMAP' account. IMAP accounts keep mail on the server. You can delete the IMAP account and set iu up again in Outlook, MacMail or Thunderbird as a POP account. Doing so, the email program will download the mail off the server and store it on your computer instead of the server.
- If you change from IMAP to POP, you will no longer see a history of your email using Webmail or your phone or other device. To continue to see recent emails, such as mail from the the last week, on your phone, device, or webmail, set your POP email settings to 'leave a copy of messages on the server' for 7 days.
Getting Started
Step 1: Log into your Gmail account, or create one.
Step 2: Go to the Settings in the upper right
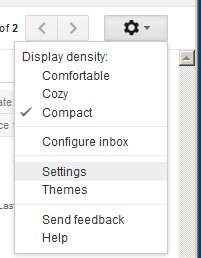
Step 3: Click ACCOUNTS AND IMPORT and then "Add a POP3 mail account you own"
![]()
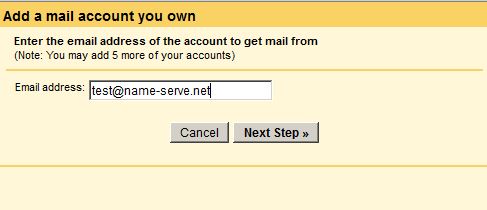
Step 4: Enter your email address (replace test@name-serve.net with your email)
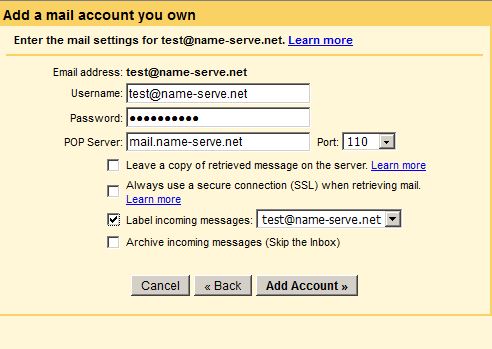
Step 5: Enter your email, password, and POP server.
- Your POP server is simply mail.your-domain.com.
- In the example, the email address is test@name-serve.net and the mail server is mail.name-serve.net
- We suggest you select only the third checkbox, "Label Incoming Messages,' for easier email management.
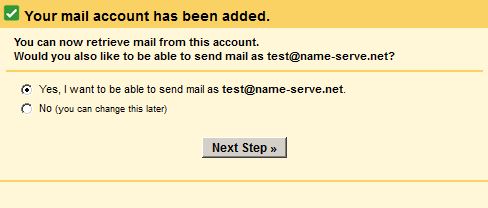
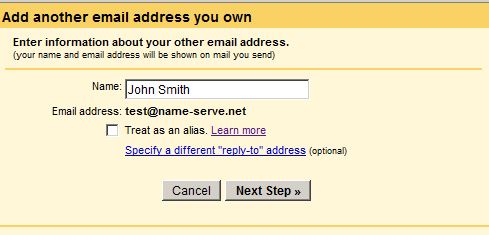
Step 6: Select YES to send mail
Step 7: Enter the name to appear on sent emails. Uncheck the 'alias' option.
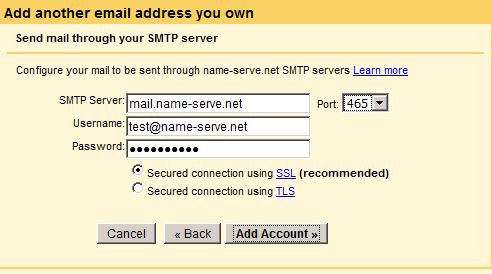
Step 8: Enter outgoing (SMTP) server details
- Use mail.your-domain.com (replace with your domain name)
- Use your full email address for the username
- Select SSL
- Change port to 465
Step 9: Enter the verification code sent to your email

Step 10: (Optional) To use this email as the default for sending, select 'MAKE DEFAULT'

Note, if you have a lot of mail on the server, it will take Gmail time to download it all. Please be patient, as it can take hours, depending on the amount of mail.
You're DONE!